
Putting Up a Chain Link Fence: A Comprehensive Guide
Installing a chain link fence is a popular choice for homeowners and businesses alike, offering a cost-effective and durable solution for security and boundary definition. Whether you’re looking to enclose a backyard, protect a commercial property, or simply add a visual barrier, understanding the process of putting up a chain link fence is crucial. This comprehensive guide will walk you through each step, from planning and preparation to installation and maintenance, ensuring a successful and long-lasting fence.
Planning and Preparation
Before you even think about digging a hole, meticulous planning is essential. This stage sets the foundation for a smooth and efficient installation process.
Determining Your Needs and Objectives
The first step is to clearly define why you want a chain link fence. Are you primarily concerned with security, containing pets, or simply marking property lines? Understanding your objectives will influence the height, gauge, and overall design of your fence. For example, a taller fence with a heavier gauge might be necessary for security purposes, while a shorter, lighter gauge fence could suffice for containing small pets.
Checking Local Regulations and Permits
Always check with your local municipality or homeowners association (HOA) regarding regulations and permit requirements. Many areas have restrictions on fence height, materials, and setback distances from property lines. Obtaining the necessary permits before putting up a chain link fence can prevent costly fines and delays down the road. Ignoring these regulations could lead to mandatory removal of the fence.
Mapping Out the Fence Line
Accurately map out the fence line using stakes and string. This will help you visualize the fence’s placement and identify any potential obstacles, such as underground utilities or tree roots. Use a measuring tape to ensure the fence line is straight and that you have the correct dimensions. Consider marking the location of gates and corners. This step is critical for ordering the correct amount of materials.
Gathering the Necessary Tools and Materials
Putting up a chain link fence requires a specific set of tools and materials. Here’s a comprehensive list:
- Posts: Line posts, corner posts, and gate posts. The size and type will depend on the height and gauge of the fence.
- Chain Link Fabric: The woven wire mesh that forms the fence. Choose the appropriate gauge and mesh size.
- Top Rail: Horizontal rails that run along the top of the fence, providing stability.
- Tension Wire: Wire that runs along the top and bottom of the fence, tightening the fabric.
- Fittings: Post caps, rail ends, brace bands, tension bands, and tie wires.
- Concrete: For setting the posts securely in the ground.
- Tools: Post hole digger, level, measuring tape, pliers, wire cutters, fence stretcher, and a socket wrench.
Installation Process
With careful planning and the right tools, the installation process can be manageable, even for DIY enthusiasts.
Setting the Posts
This is arguably the most crucial step. The stability of your fence depends on the proper installation of the posts. Dig post holes that are at least one-third the height of the post, plus a few inches for gravel. For example, for a 6-foot post, the hole should be at least 2 feet deep. Add a layer of gravel to the bottom of each hole for drainage. Set the posts in the holes, ensuring they are plumb (perfectly vertical) using a level. Pour concrete around the posts, making sure it is properly mixed and free of air pockets. Allow the concrete to cure for at least 24-48 hours before proceeding. [See also: Concrete Curing Times for Fence Posts]
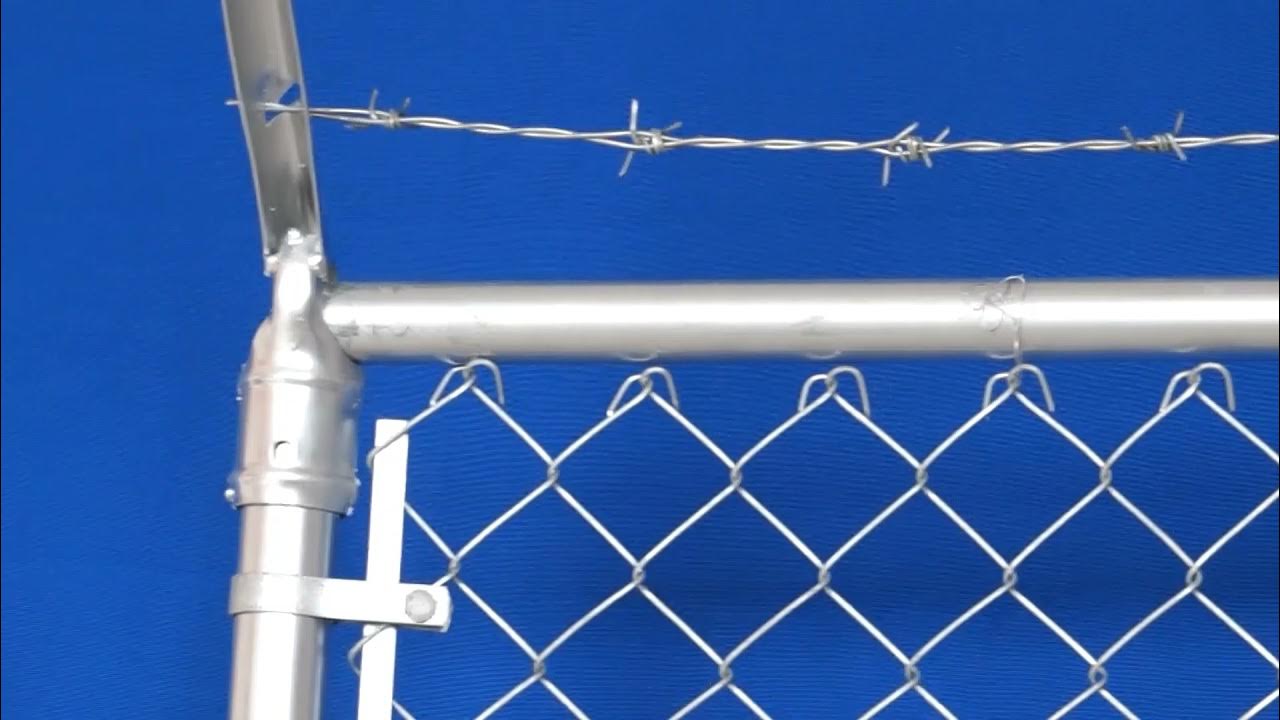
Attaching the Fittings
Once the concrete has cured, attach the post caps to the top of the posts. Install rail ends on the corner and gate posts. These fittings will hold the top rail in place. Use brace bands to secure the top rail to the posts. Ensure all fittings are securely fastened.
Installing the Top Rail
Insert the top rail through the rail ends. If the rail is too long, cut it to the correct length using a pipe cutter or hacksaw. Secure the top rail to the brace bands using bolts. The top rail provides significant structural support to the entire fence.
Attaching the Chain Link Fabric
Unroll the chain link fabric along the fence line. Attach one end of the fabric to a corner or gate post using tension bands. Use a fence stretcher to pull the fabric taut. This tool is essential for achieving a tight and professional-looking fence. Attach the fabric to the remaining posts using tension bands. Weave tension wire through the bottom of the fabric and attach it to the posts using tie wires. This provides additional stability and prevents the fabric from sagging.
Adding the Finishing Touches
Trim any excess chain link fabric using wire cutters. Ensure all fittings are tight and secure. Install any gates according to the manufacturer’s instructions. Check the entire fence for any loose connections or potential hazards. Consider adding additional security features, such as barbed wire or security cameras, if desired.
Maintenance and Care
Even a well-installed chain link fence requires regular maintenance to ensure its longevity and functionality.
Regular Inspections
Inspect the fence regularly for any signs of damage, such as rust, loose fittings, or sagging fabric. Early detection of problems can prevent more significant issues from developing.
Cleaning
Clean the fence periodically with soap and water to remove dirt and debris. This will help prevent rust and corrosion. A pressure washer can be used for larger fences, but be careful not to damage the fabric.
Repairing Damage
Repair any damage promptly. Replace rusted or broken fittings. Tighten loose connections. If the chain link fabric is damaged, patch it with new fabric or replace the entire section. Ignoring damage can compromise the structural integrity of the fence.
Benefits of Choosing a Chain Link Fence
Putting up a chain link fence offers numerous advantages:
- Cost-Effective: Chain link fences are generally more affordable than other fencing options, such as wood or vinyl.
- Durability: Chain link fences are resistant to weather damage and require minimal maintenance.
- Security: Chain link fences provide a strong visual deterrent and can be enhanced with security features.
- Versatility: Chain link fences can be used for a variety of purposes, from residential to commercial applications.
- Visibility: Chain link fences allow for unobstructed views, which can be beneficial for security purposes or simply enjoying the surrounding landscape.
Common Mistakes to Avoid When Putting Up a Chain Link Fence
While putting up a chain link fence can be a DIY project, avoiding common mistakes is critical for a successful outcome.
- Inadequate Planning: Failing to properly plan the fence line, check local regulations, or gather the necessary tools and materials can lead to delays and frustration.
- Improper Post Installation: Setting the posts incorrectly is a major mistake that can compromise the entire fence’s stability. Ensure the posts are plumb and the concrete is properly cured.
- Insufficient Tension: Not stretching the chain link fabric taut enough can result in a sagging and unprofessional-looking fence. Use a fence stretcher and ensure the tension wire is properly installed.
- Using Low-Quality Materials: Opting for cheaper materials can save money upfront but may result in a fence that is less durable and requires more frequent repairs.
- Ignoring Safety Precautions: Always wear appropriate safety gear, such as gloves and eye protection, when working with tools and materials. Be aware of underground utilities and avoid digging near them.
Conclusion
Putting up a chain link fence is a project that requires careful planning, attention to detail, and the right tools. By following the steps outlined in this comprehensive guide, you can install a durable and functional fence that meets your specific needs and enhances the value of your property. Remember to prioritize safety, adhere to local regulations, and invest in quality materials for a long-lasting and aesthetically pleasing result. A well-installed chain link fence provides security, defines boundaries, and adds value for years to come. Whether you’re a seasoned DIY enthusiast or a first-time homeowner, understanding the intricacies of putting up a chain link fence empowers you to tackle this project with confidence and achieve a professional-grade outcome. The key is patience and precision. Taking the time to do it right the first time will save you time and money in the long run. So, gather your tools, plan your approach, and get ready to enjoy the benefits of a well-constructed chain link fence.
